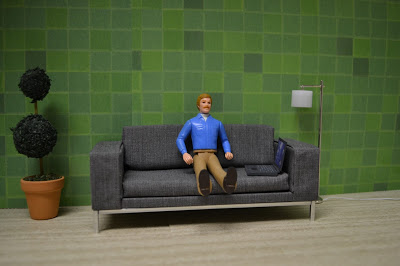
WallPops! Featuring Jonathan Adler

OK, I am in love. 

You've probably caught drift of an ongoing trend in 1:1 scale design over the past few years -- wall decals -- but I cannot say that they have taken hold of the world of modern miniature design. It has occurred to me in the past to try to adapt decals for scenes, but the scale of the prints never seemed right (mostly too large) and they generally were not aesthetically appealing (too childlike or too ho-hum).

Until now...!

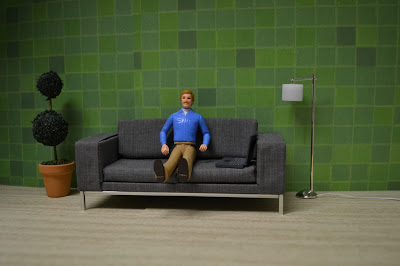
One of the highlights of my visit to the New York International Gift Fair (my review of NYIGF and Toy Fair is forthcoming) was the WallPops! line of decals, especially their collaboration with Jonathan Adler. I was blown away by the bold, gorgeous prints, and knew that I could use them in modern mini environments.

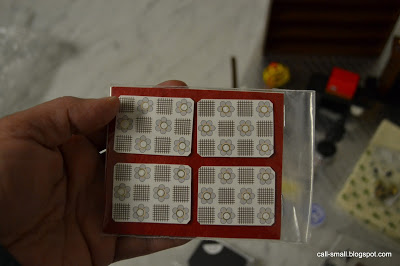
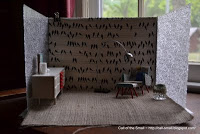
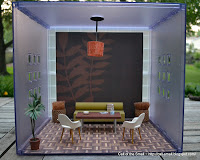
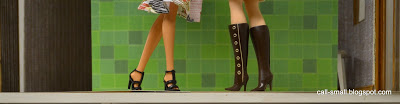
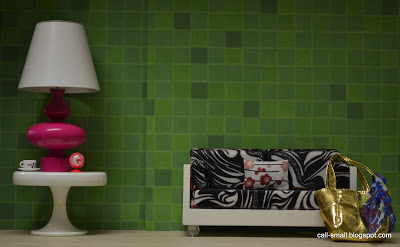
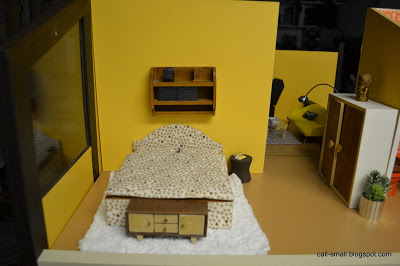
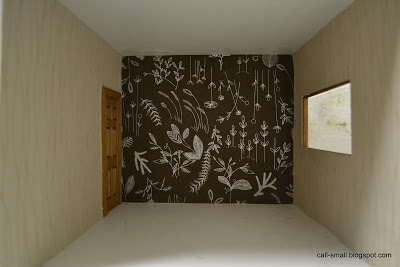
I tried the "Santorini" Stripe roll, which measures 6-1/2" wide and 12' long and retails for $17.99.


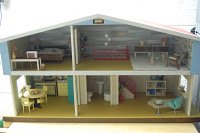
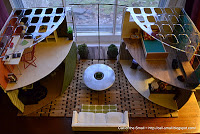
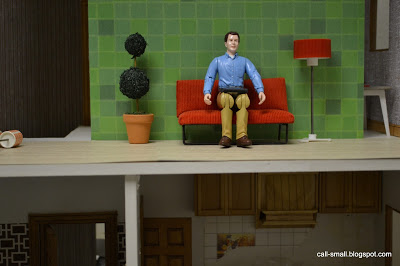
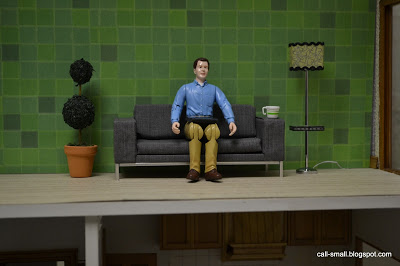
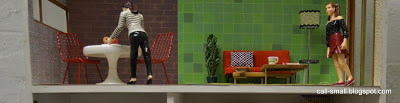
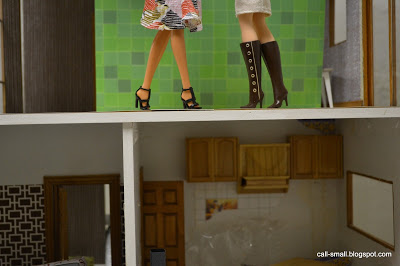
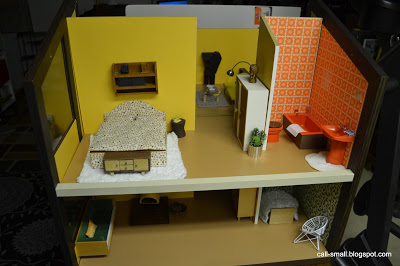
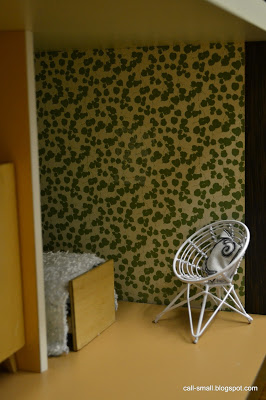
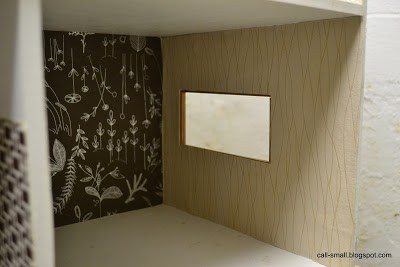
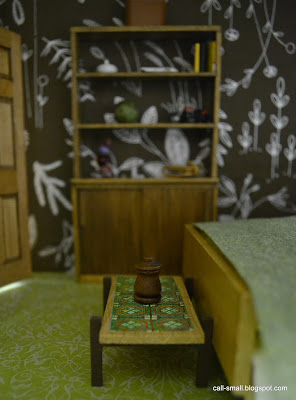
I chose my Kaleidoscope House for this scene, thinking that the plastic panels would make for a smooth backdrop. The roll has an adhesive backing that is REMOVABLE -- yes, it did easily peel off without any residue or damage -- and they are very easy to cut to size, apply, and smooth down.

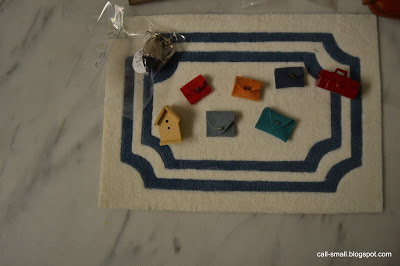
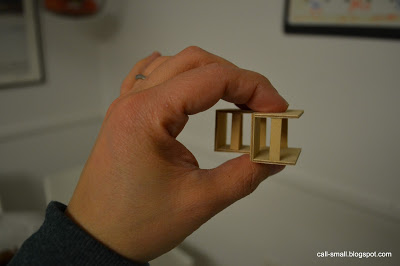
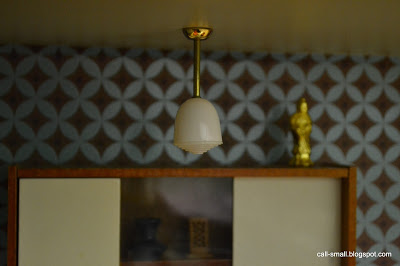
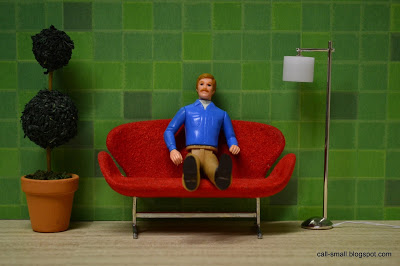
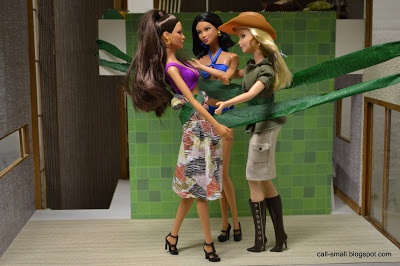
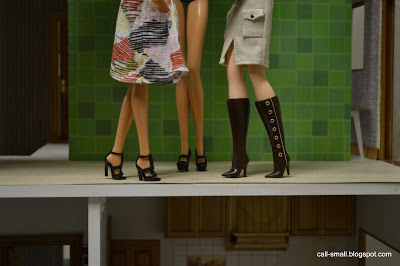
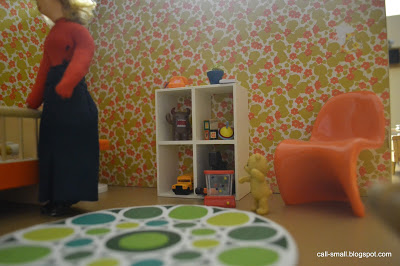
The room is transformed into a chic, mod (shoe) den! I even was inspired to use some of my gold Deco Tape on the ladder, to help integrate it more in the room.


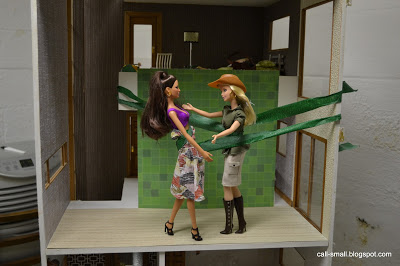
I see a lot of uses for WallPops! for modern dollhouses and room boxes, and it is nice to have a creative alternative to scrapbook paper. In addition to the rolls, there are coordinating designs that come in "dots" (13" in diameter) and "blox" (13" x 13" sheets), so you could easily adapt them for flooring, wall paper, and ceiling decoration. I would not recommend applying WallPops! over existing wallpaper, but plastic or wood walls would work well. Regardless, I do recommend testing a small, inconspicuous spot of the surface to ensure the decal easily peels off.

Thanks, WallPops!, and please let me know if any of you decide to take the leap into decals!

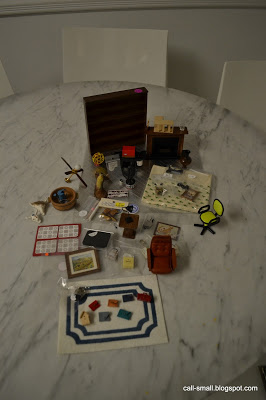
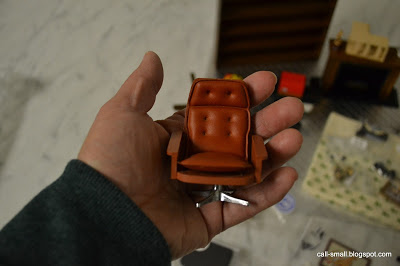
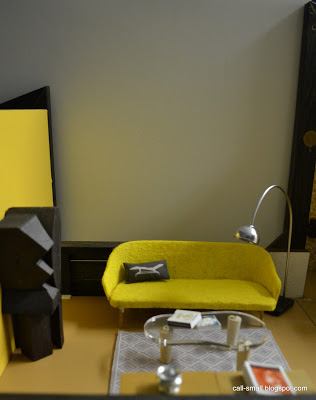
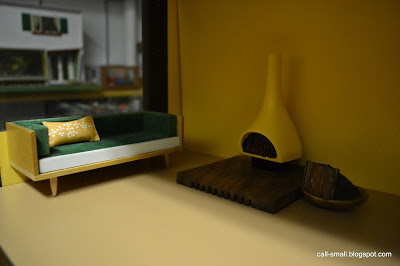
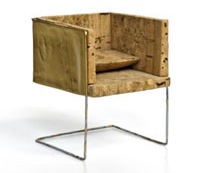
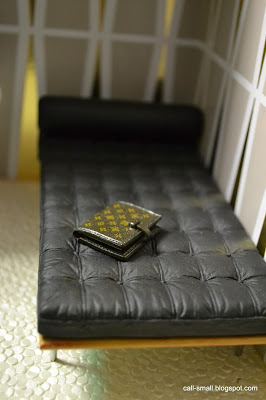
Credits: Daybed is Reac; sideboard is vintage German; vase is a dollhouse show find; flooring is Indian Embossed Pebbles paper from Kate's Paperie; globe light is minimodernistas. Accessories are Barbie, Re-ment, and AG Minis

The time it took me: 2 hours (I fussed over furnishings, even though it ended up being pretty minimal)


Hightstown Miniature Show: 2013

The priciest piece--I negotiated down to $15.

The Hightstown Miniature Show in Hightstown, N.J., was on Saturday and I was able to run over for 1-1/2 hours. It's quite ideal: small (it's held in a church activity room), fifteen minutes from my house, nice people, and not a lot of vendors (maybe twenty or so). The drawback is that the wares are overwhelmingly traditional, but as with my visit last year, you can find some vintage gems and other treasures from the $1 bin!

My spoils are in the following photos. I probably did five or six laps around the room, making sure I hit each vendor. I spent more time at some than others, and often found things on my second or third round that I didn't see earlier. Read the captions for more detail!

I hope to use some of these pieces very soon!

The whole lot! I spent less than $75

Neat rug with some handmade purses, a tool box, birdhouse, and a fancy decanter.

I have a feeling this light will come in handy.

A reindeer head came home with me, even though the seller dropped him as she was wrapping him! We glued him on the spot and he's ready for his closeup.

A fireplace and a few knickknacks will likely come in handy. Not sure what the wooden piece is, but it looked like a modern house to me! 

Vintage fabric, a moose painting, fancy gloves, and some accents caught my eye. 

More stuff...

A wooden shelving unit will always come in handy!

Good for rain!

Cute placemats!

The find of the day: a Lundby "Brasilia" office chair, which I have been looking for to match my other Brasilia pieces: it was $5!!!!

This was one of the more unusual finds of the day.

I still think this could work as a modern dollhouse in a dollhouse!
Hit any fairs lately? Any coming your way? Be sure to share your spoils!

New Shoes


This is one of those scenes completely inspired by a Re-ment purchase. It has certainly happened before and will happen again!

This time, it is #5 from the "Department Store Shopping" set, which includes a Louis Vuitton-style pair of shoes, suitcase, datebook, and pen with case. All very realistic!


Obviously, there's lots of brown going on here, so I chose a masculine paper to complement the pieces, and accessorized the room from there. I like this little spot in the Bodensee -- a nice corner room with a view!


By the way, if you are interested to see Re-ment sets compiled, Renatta has developed a wonderful resource at her webpage, iamneverbored. Go and have a look!

And...if you are looking to purchase Re-ment, Jane of Harapekodoggybag has an amazing selection and her prices are fair, even with shipping from Japan. The quality of her pieces is pristine, and she has many older, discontinued sets. Warning: you will buy something!

Stay tuned for my recap of the New York International Gift Fair and the Toy Fair! Posting soon!

Credits: Chairs are Bodo Hennig; table is Petite Princess; storage unit is vintage German, likely VERO; Rug is a cut piece of embossed felt from Michaels; light is vintage German; planter is by Lene of Dragondee Modern Miniatures; wallpaper is scrapbook paper from DCWV "Downtown Loft" stack. Accessories are Re-ment, Petite Princess, AG Minis, and random dollhouse store finds.

The time it took me: 42 minutes

My Collection


I've been asked many times: how many houses do you have in your collection?

I usually stumble, mainly because I have not compiled them in one post to date. It seems like such a simple thing, considering this hobby entails some level of attention to detail, but...

The Shopping Sherpa compiled all of her houses into a resource page a few years ago when she was preparing for an exhibit of her houses, and this has inspired me to do the same. I often go an drool over her houses and it's nice that they are all accessible for quick viewing!

I decided to create this post and I can add to it when new things enter in my collection. I will put a link on the sidebar of my blog too so that it can be accessed by the curious.

Hope you enjoy my little tour...

Here are my dollhouses in rough order of acquisition, beginning in 2008. I included the year of production--or the closest approximation--for each structure, and I have hyperlinked to the first post on the house. I also note if the house is made from a kit or was a scratch build from plans; if there is no notation, then the house was built by the manufacturer or required assembly.

Please note that I have grouped room boxes, fold away/pop up houses, and vintage school rooms together in one category after the collection listing.

Call of the Small Collection

1. Villa Sibi, 2004


2. Lolly's Citadel, 1980s (kit)


3. Sylvanian by TOMY, early 1980s


4. Lundby Stockholm, 2005


5. Kaleidoscope House, 2001


6. VERO, early 1970s


7. Large VERO, 1966


8. BRIO, 1966


9. A-Frame by Whitman, 1978 (kit)


10. "L" Ranch by Marx, 1953


11. Smaller Home and Garden by TOMY, 1980


12. Bungalow by Haefner & Krullmann, early 1960s


13. BRIO Chalet, 1963 SOLD in October 2014


13. Betsy McCall House, 1950s (build)


14. Highland by Artply, 1980s (kit)


15. House by Moritz Gottschalk, early 1960s


16. Contemporary Dollhouse by Doll Domiciles (under construction), 1970s/80s (build)


17. Bodensee by Bodo Hennig, 1981


18. Seeblick (Sea View) by VERO, 1960s


Room Boxes, Fold Away/Pop Up Houses, Smaller Scale Houses, and Vintage School Houses

IKEA Room Box, 2010


German School Room, 1960s  SOLD in January 2015


Fold Away Dollhouse, 1949


Instant Dollhouse by Winthrop, 1960s


Crate & Barrel Room Box, 2010


Fish Condo by UMBRA, 2010


Lil' House Wonderfull, 1981


Plasticville Structures, 1950s


Room Box by AG Minis, 2000


School Room by Bodo Hennig for F.A.O Schwarz, early 1960s


Tissue Boxes by Crate & Barrel, 2011


Room-in-Miniature Room Box and Furniture by Miner Industries, early 1960s


Cadet Room Box, 2011


Neville House by CB2, 2011


Rad Pad, 2011


Epoch Play House, 1973


Lekman Box by IKEA, 2000s (?)


Jennys Home, 1965


Ben Holiday House by CB2, 2012


Vinyl Modern House by Ideal, 1970


Blue Box House, 1980


Loft to Love, 2015


Anyone have their own mini resource page for their collection?

Dollyhome Furniture by Child Life Toys

Here's a little piece of 1950s dollhouse history to share! It is always great to find vintage pieces in their original boxes, with directions or other literature. You step back in time and get a feel for what it might have been like to open them new. You also get a window on information that might be lacking (for yourself or others), and may even solve a mini mystery!

As I was writing this post, I reminisced on some of my favorite "original box" moments:
Rooms-in-Miniature by Miner Industries

Keystone Village Houses

Instant Doll House by Winthrop Toys
Sigh...!

My latest "original box" moment was this set of Dollyhome furniture by Child Life Toys, which I purchased recently on eBay.


The set is in very good condition and came in its original box with directions and a promotional mailer.


The furniture was made in 1957, specifically to be used with the Dollyhome contemporary ranch, which I actually used to have in my collection:


It was a lovely house, made of cedar and quite sturdy. But, the scale was large and it opened only from above, so I decided to sell it. It was a bear to ship, and I probably lost money on it. Oh well.

But, when I saw the furniture, I was intrigued and bought it even though I knew the scale would be large. I believe it to be closest to 1:6, but after looking through the set, I probably could get away with using a few of the pieces in 1:10 or even 1:12.

Curious what I found in the box? Here's a little visual journey...


One piece is a mystery; and two pieces broke off. The squares on the bed are supports that get glued on the inside top and bottom of the bed frame to hold  up the main bed piece.

Everything looks to be there for the couch, side chair, and four dining chairs

The dresser might work in 1:12
All the pieces are made of heavy duty fiberboard covered in a wood veneer. The couch and side chair are painted with a retro dotted pattern, whereas the dining chairs are salmon colored. The pieces are constructed by sliding the grooved sides together and securing them with glue. I was able to put the chair together by just sliding the pieces together, but the larger couch and side chair need their arms/legs glued. I am not sure when I will get to assembling them; I might do the coffee table and the other dining chairs first.

Hope you enjoyed this mini time travel trip! Let me know if you have any Dollyhome pieces, and I'd love to hear about some of your favorite "original box" moments!

Photo © 2013 About.com Inc
By the way...the About.com Readers' Choice Award nominations are now active! You can vote for your favorite blog, kit, and other mini world things. Get out the vote for your faves! I have!

Dear Girls Above Me: My First Book Cover

It seems fitting to mark the start of my fifth (!) year of blogging with a little (big) announcement!

I am consistently amazed at the depth of this mini universe. It's been incredibly rewarding to meet and connect with hobbyists, design aficionados, artisans, and the generally curious since I started this blog in 2009. Some of these connections resulted in collaborations, such as the styling and photography spread I did for Ladies' Home Journal on real-life clutter, the exhibit featuring a fully-furnished Kaleidoscope house at my local Design Within Reach store, and interviews, articles, and other coverage in publications around the world. In each of these cases, there was a genuine fascination with the modern twist on miniatures, which made these events and interactions even more gratifying. Without a doubt, the article on modern miniature design in the New York Times in 2010 definitely helped to spark people's interest in this emerging side of the hobby.

Just over one year ago, I was contacted by Crown Publishing Group, part of Random House, to design a cover for a book by first-time author Charlie McDowell titled Dear Girls Above Me. McDowell, a comedian and filmmaker (and son of actors Malcolm McDowell and Mary Steenburgen) has an incredibly popular Twitter feed about the actual "girls" who live in the apartment above him. This is Charlie:

Profile photo from Twitter

He cannot help but listen to their chatter, and he shares very entertaining bits of their conversations, addressing them "Dear GAM" ("Girls Above Me"). A few recent ones:

Dear GAM, “Hey Claire, can I borrow your car so I can pick up my car from the shop?” You might wanna also consider borrowing Claire.

— Charlie McDowell (@charliemcdowell) January 11, 2013

Dear GAM, "Poor Lance Armstrong. It's embarrassing enough that he has erectile dysfunction." Different performance enhancing drugs.

— Charlie McDowell (@charliemcdowell) January 14, 2013

Dear GAM, "I wish I knew a veteran so I could get some of these great deals at Nordstroms." Life. Liberty. Discounted pillow shams.

— Charlie McDowell (@charliemcdowell) November 12, 2012

While I had not heard of McDowell, I became enamored with his posts and was excited by the prospect of doing the cover for his book. My contact at Crown, designer Jessie Bright, provided me with some very rough sketches, a color palette, and some screen shots from my blog that she thought would provide good starting inspiration. The basic concept was a cover that had Charlie sitting on a couch on the bottom half and the legs only of the "girls" on the top half. They asked that I keep the setting very minimal, i.e., do not create two whole apartments, and they also wanted me to use dolls so that it looked intentionally artificial. They wanted Charlie to have a retro/hip look and for the "girls" to be very...yes..GIRLIE!

The first step were the dolls. I normally do not use dolls in my scenes, but had some Kaleidoscope House figures, so I started experimenting. I decided to use my Citadel for this job, since it has the open double-height space.

This doll was not quite right (although they liked his legs), so they asked me to research other "modern" dolls. Jasper from "Twilight" was mostly just for fun...and he cannot sit!

I then suggested the Dad that came with the TOMY Smaller Home and Garden dollhouse.

Courtesy of Andy&Shel on Flickr

Crown LOVED this look for Charlie and were not deterred by the fact that his legs did not bend. I thought I had one in my collection, but couldn't find him. I put out word on my Facebook page to see if anyone would be willing to loan one in pristine condition, and the lovely Susan H. came to the rescue! She kindly loaned him for four months as I experimented with Crown. Thanks again, Susan!!!!

In terms of the setting, I researched some modern lamps and Crown liked this one from miniatures.com. The AG Minis topiary was a winner from the beginning. The flooring is wood grain paper from the Paper Source, and they asked that the backdrop be green, to make it easier to PhotoShop the final walls at the end. I shot "Charlie" on a few different couches. Here are some shots showing various couch options:

Too stylized

Too big

Too small

Too uncomfortable

Too contemporary

Just right! We all liked the grey couch best (created by the lovely Annina), so Crown asked that I do some shots from different angles with a laptop so that we could come up with Charlie's final pose:

Too passive

Too high above

Not quite

YES!!!

With Charlie figured out, I turned my attention to the "girls." I tried a few Kaleidoscope House dolls, but they did not make the cut.

It was a good process to accessorize the space, but Crown decided they wanted it even more minimal. As I was figuring out the furnishings, I suggested using Barbie dolls, since we were going for a truly "girlie" look. I have to admit that I was intimidated by the large scale. I also had to confront the issue of making them stand and pose without stands, since I needed to keep my hands free to photograph. Here's how I did it...

Painter's tape, while crude, did work!

And then I added a third gal, at Crown's request.

The painter's tape approach did work. No Barbies were harmed during the shoot!

I think they worked really well with their lovely little legs! Crown requested that the girls be positioned closer together, and that the middle girl have a more form-fitting skirt. I got some black adhesive felt, which did the trick. I styled the background with one of my favorite vintage Bodo Hennig tables, a Barbie by Jonathan Adler pink lamp, and a cup/saucer and clock by Re-ment. The couch is AG Minis, and the pillow is by minimodernistas. The bag is Barbie's.

With the girls completed, I submitted the photos to Crown in May and they did their magic with the backdrops. As it turned out, Crown had to amend the TOMY doll's face to comply with legal, so he had a bit of a face lift and shirt makeover. They also used the Kaleidoscope Dad's bent legs! But everything else fit into place. 

I am really pleased and excited. The book comes out in June and it's neat to see it on Amazon already.

Cool, right??

This was a great learning experience, and the folks at Crown were a real pleasure to partner with on this project. I'd love the opportunity to do more covers and styling in the future!

Thanks, Crown, and best of luck to Charlie McDowell and his book! I'm definitely getting a copy!!!

Bodensee by Bodo Hennig

 
I am finally ready to reveal my little (big) surprise, hinted to in this post. You all probably knew it was a new dollhouse, but did you guess it was a

Bodensee by Bodo Hennig??!!!

This house was on my "covet" list, after I first saw it on Rebecca's Collections and the puppenhausmuseum website a few years ago. Manufactured in 1981 by Bodo Hennig, and now generally quite scarce, the house is 1:10 scale, enormous, and heavy. I have never seen one pop up on eBay until this past December, on German eBay. I've bought doll houses from Germany and other countries before and it is not a walk in the park. The shipping is outrageous, and you can sometimes get stuck with a less-than-professional seller, leaving you on pins and needles until your house arrives. Well, I still paid a lot, but the seller was truly wonderful. She disassembled the house and packed it extremely well. Everything arrived intact. And the house is in phenomenal condition!

As expected with a Bodo Hennig product, it is exceedingly well-made (blogger diePuppenstubensammlerin wrote a great article about the company in Dolls House Past and Present -- check it out!). Every screw and part fits perfectly, and if they do not, then you are doing something wrong. It is constructed of solid particle board and wood, and many of the walls are sheathed in a formica-like material for the plain yellow walls, and colorful wallpaper on the other walls. There is nice glazing in the windows. The house measures 37" x 24" x 23" with a total of eight rooms and a large removable stairwell.

After unwrapping everything, I got started. I assembled it using photos of the house as a guide:

Big box!!!


I made a mistake with one of the walls, which I realized after the roof parts did not fit! DUH!

The tall white wall on the right is in the wrong spot!
 After I fixed the walls, the roof went in!


In order to get it off the floor, I took the roof apart so that I could separate the two parts of the house. My husband and I then lifted it onto one of my storage units. Many, many apologies for the surroundings...our basement is, well, a basement, so there are boxes, storage things, an elliptical machine, etc.

Here it is perched in its new spot.


I did some decorating, too. The house came with a lot of original Bodo Hennig furniture, lamps, and three dolls.


Do you like it??? It did take me forever to decorate...so many rooms! And so much space. Since the scale is 1:10, I had to look for some larger pieces in my collection.

I am so happy to have the house, and am excited to think of different ways to use the rooms and style it. If you have a Bodensee too, please share!!!

Credits: Ugh, so many to mention! The majority of the pieces are Bodo Hennig and vintage German pieces from my collection. A shout-out to Megan of Modern Mini Houses for the cool pillows on the green couch and the yellow couch!!!

The time it took me: Probably 2-1/2 hours to unpack and assemble (and partly re-assemble to move), and 1-1/2 hours of decorating. Maybe more. I did it over the course of last week and this week.

Design Within Reach Champagne Chair Contest: Circle Chaise


I just finished my entry for the Design Within Reach Champagne Chair Contest. Introducing...

Circle Chaise


I used two corks (thanks to my Mom and a work buddy) and decided to cut thin, uniform (or as best as I could manage) circle shapes to form a chaise lounge. At first I was not going to nest the circles, but then there were gaps, so I cut and sized each one. I then sealed everything with Aleene's Tacky Glue and used one of the cages for hairpin legs. The tops of both corks are the pillows!


This was a lot of fun -- I enjoy getting immersed in a hands-on task like this. You can see the photo gallery of entries here, or on Twitter with hashtag dwrchampagnechair. Very creative stuff! A few of my favorites:


Let me know if you entered!

UPDATE, 1/22/13: Design Within Reach just posted the top 10 finalists and 7 Honorable Mentions for the Champagne Chair Contest here. No modern miniature peeps made the cut this year, but the competition was fierce! Megan of Modern Mini Houses and Mini*Aesthetics did a wonderful job of transforming their materials -- really impressive! Mini*Aesthetics also felt compelled to write an articulate open letter to DWR. Read it here. Congrats to all who entered and to all who have been singled out by DWR!


A Tease


Any guesses what I've been working on late into the night these past few days??

Here are a few photos to keep you wondering. More to come...!


Design Within Reach Champagne Chair Contest

Courtesy of Apartment Therapy
Hey, mini community: got any leftover champagne corks and cages from New Years? 

Well...now is your chance to create an original mini chair using only glue and those materials for the annual Design Within Reach Champagne Chair Contest!

The contest started in 2002, and there's been some awesome eye candy over the years. Here's some past entries:

2010 entries courtesy of Design Romp


Above three images courtesy of Apartment Therapy

Courtesy of Design Within Reach
Amazing, right?

Are you entering? I am going to try my best, although I have no corks or cages!! Wish me luck in finding some!

All the contest details are here. The grand prize is a $1,000 gift certificate to Design Within Reach, and the second and third place winners will receive $500 and $250 gift certificates to DWR, respectively. Check out all the current entries on Twitter using #dwrchampagnechair.

You have until 5:00 p.m. Eastern time on January 14, so get cracking (or popping?)!


GOOD LUCK AND SPREAD THE WORD!


Citadel Progress


It's always nice to make progress on a dollhouse that is in "rehab," especially since I have four that need all sorts of work, and I never feel like I pay any of them the right amount of attention. I noticed that I also started out the new year last year with a "rehab" post about two different houses in my collection, so perhaps this will become a tradition!

The Citadel dollhouse, known as "Lolly's Citadel" for the Chicago-area dollhouse store that created the kit in the 1980s, is a formidable structure. As you may know, I drove from New Jersey to Chicago in 2009 to pick up the house, which was decorated in a very traditional style. Over the past three-and-a-half years, I have been slowly renovating and redecorating the house; you can read all my Citadel-related posts here.

I have happily finished rehabbing one side of the house (not including the door), and wanted to share some views of the latest room, on the ground floor. The room was originally used as the kitchen, which is very odd to me, since the room is quite small and closed off from the rest of the main floor. Here is a picture of the house after I picked it up; I brought it to Lolly's to have them check it out:


The colors are so off-putting...hurts my eyes just looking at it again!!

I pulled the kitchen pieces off the wall and scrapped off as much of the wallpaper and flooring as I could.


I decided to make this room a guest bedroom, and kept within the brown, white, and creme palette with a lovely chocolate and silver flower-printed paper from the Paper Source on the back wall, and some cool vintage paper that I believe I purchased from UK eBay. It has a suede-like texture and a nice neutral tone and design. I only had two large scraps, so I measured and cut very carefully!

Here's some photos of the wallpapering-in-progress:

Back wallpaper done!

One side complete!

And the other!

The new wallpapers!
 What do you think? I set up a scene too:

The flooring is also from the Paper Source, but it is not glued. I wanted to leave it flexible.


I gave a piece of felt some fringe for a quick DIY coverlet!


I am happy with the results, especially since the whole side looks more integrated and like an actual home.


While the house is really starting to come together, I still have a ways to go. The main stairwell needs to be put back, and the front tower of windows needs to be repaired. Then there is the balcony on the side of the house, which fell off, and the ground floor on the other side of the house needs to be completely configured into a kitchen. That will take some serious space-planning and thinking!

UPDATE, 1/2/13: In response to Steinworks' comment about layout of this side of the house, it occurred to me that I should share pictures of the *other* side of the house. There's a lot of house here!!! When I mentioned the kitchen being on the main floor, I meant the ground floor in these photos:


(Sorry about the mess!!) So, I'd imagine that the kitchen and eat-in area would be on the main floor, and the upper left room would be another bedroom or study, and a bath on the right. I should also mention that all my houses are intentionally kept flexible...I often change rooms around and avoid committing to a certain plan.

UPDATE: 1/13/13: In response to Megan's request...a picture of the stairwell, when I originally picked up the house. Only the top part is there; there is a bottom set of stairs that broke off.


All of your comments and feedback really keep me going with this and other projects, so thank you! I look forward to sharing more on the house in the months to come!

Here's to a productive 2013!

Credits: Bed, side table, and chair are vintage German; globe lights and red pillow are minimodernistas; shelving unit is by Bruce Dawson; plant is Playmobil; low table is vintage Lundby; yellow bed sheet is fabric from Jo-Ann with felt from Michaels; flowered wallpaper and flooring is from the Paper Source, and side wallpaper is from UK eBay. Accessories are AG Minis, Nancy Tobey, Michaels, Hallmark, Annina, Re-ment, and random eBay finds.

The time it took me: 2 hours, including the scraping and re-wallpapering